 |
| Image credit: WCCFTech |
Cloning and deploying Macs new or old is a regular task in my line of work. Usually I have this one master image to be used on multiple Macintosh computers. There are several ways to clone a Mac - Netrestore, Time Machine backup, Deploy Studio and the easiest and fastest of all, using the built in Disk Utility app. Today I'm going to give you the definitive guide on how to clone your entire Mac hard drive using just the Disk Utility app.
First you're going to need an external hard drive or USB drive with a bootable Mac OS on it. If you don't have one, you're going to have to create one. It's pretty straightforward really. Partition your external hard disk with GUID partition, install Mac OS on one of the partition and you're good to go. If you're still not clear, search around the net on how to install Mac OS on an external hard drive.

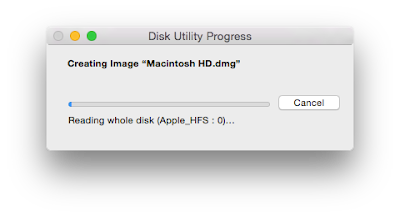
Next you'll have to create a master image of the source hard drive that you are going to clone. Open Disk Utility on the source computer. Select the Macintoh HD logical partition (second one under the physical drive) and click New Image. Save the disk image with a meaningful name and image format compressed to save space. Creating this disk image should take a while, especially if you have a lot of data inside. When you're done, copy this disk image to the external hard drive with the bootable Mac on.
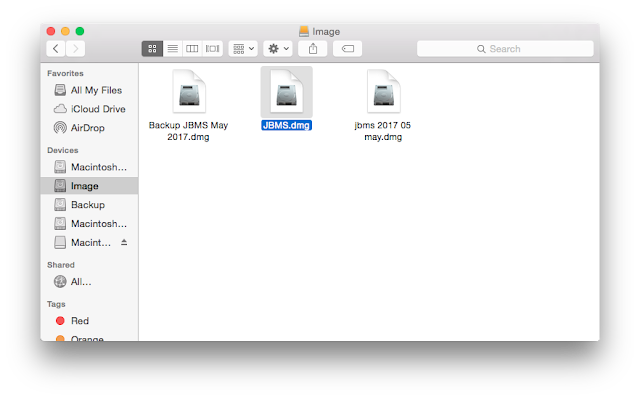
After that, boot your Mac with the bootable external hard drive that you have or created earlier. Another method is to use a bootable Mac installer drive or a recovery partition but it would be slightly more complicated to navigate the installer menu instead of a full-fledged operating system. So once Mac OS from your external drive is loaded, double click on the source disk image you created earlier to mount it.
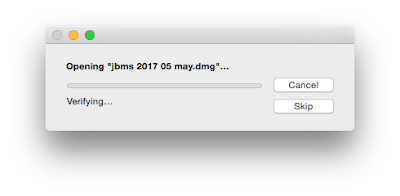
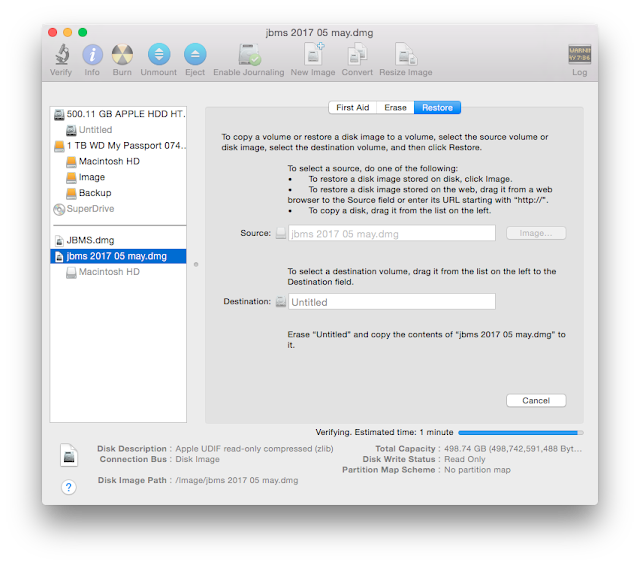
If the verification process takes too long, you can always click Skip.

Now open up Disk Utility and you're going to erase the hard disk on the destination Mac, which is the one the Mac OS is currently loaded on. You need to erase both the logical volume (second partition) and physical disk (first partition) as shown in the pictures above.
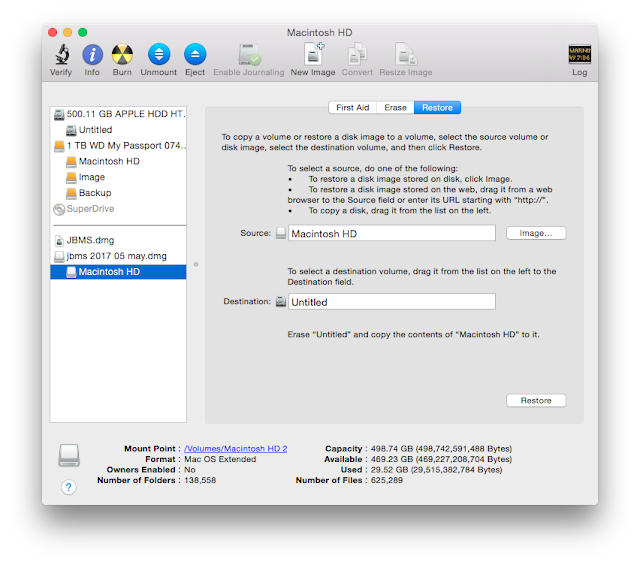
When you're done erasing, next you're going to restore the source image to the destination hard disk. Since you've already mounted the disk image earlier, it will show in Disk Utility as shown above. Drag the disk image, in my case Macintosh HD to the Source box. Then drag the logical volume you've just erase (in my case its called Untitled) to the Destination box. Finally click Restore to start the cloning (restore) process.
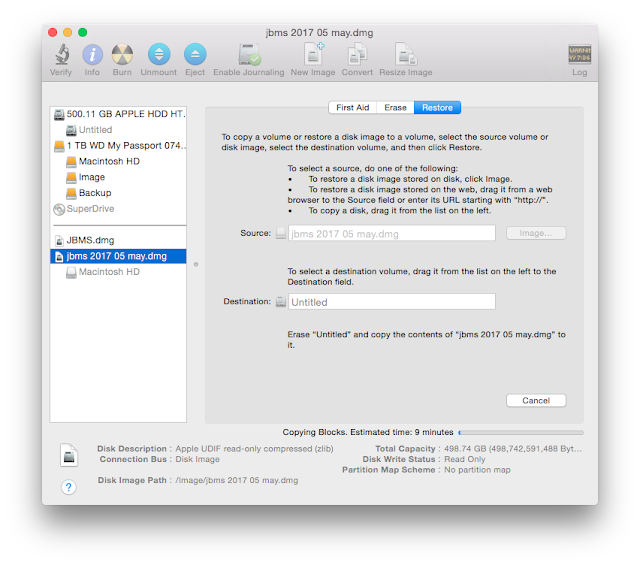
Disk Utility will now copy your disk image block by block. This process will take between a few minutes to over an hour depending on the size of your hard disk and data. For example, the 25GB image that I used took about 9 minutes to finish copying.
When you're done, just restart the Mac and it will boot with the new image, just like that. I created this guide because over time I tend to forget the correct partition to drag and the important steps to take (like erasing the destination hard drive first) to accomplish this cloning exercise. If you follow these steps exactly to the letter, you will hopefully will not encounter any problem in cloning your Mac. The most common mistakes are like dragging the wrong partition or not mounting the source image first beforehand. If you see a dialogue box about scanning the disk image first before restoring, you probably missed a step earlier or you've selected the wrong partition. Remember it is always the second partition for the source and destination image. Other common problems you could encounter include faulty external hard drive, faulty external hard drive cable (no kidding) or a corrupt source image. This guide was created on a Yosemite 10.10 machine but it should be similar on Sierra or newer systems.
First you're going to need an external hard drive or USB drive with a bootable Mac OS on it. If you don't have one, you're going to have to create one. It's pretty straightforward really. Partition your external hard disk with GUID partition, install Mac OS on one of the partition and you're good to go. If you're still not clear, search around the net on how to install Mac OS on an external hard drive.


Next you'll have to create a master image of the source hard drive that you are going to clone. Open Disk Utility on the source computer. Select the Macintoh HD logical partition (second one under the physical drive) and click New Image. Save the disk image with a meaningful name and image format compressed to save space. Creating this disk image should take a while, especially if you have a lot of data inside. When you're done, copy this disk image to the external hard drive with the bootable Mac on.

After that, boot your Mac with the bootable external hard drive that you have or created earlier. Another method is to use a bootable Mac installer drive or a recovery partition but it would be slightly more complicated to navigate the installer menu instead of a full-fledged operating system. So once Mac OS from your external drive is loaded, double click on the source disk image you created earlier to mount it.

If the verification process takes too long, you can always click Skip.

 |
| Erasing the logical partition |
 |
| Erasing the physical disk |
Now open up Disk Utility and you're going to erase the hard disk on the destination Mac, which is the one the Mac OS is currently loaded on. You need to erase both the logical volume (second partition) and physical disk (first partition) as shown in the pictures above.

When you're done erasing, next you're going to restore the source image to the destination hard disk. Since you've already mounted the disk image earlier, it will show in Disk Utility as shown above. Drag the disk image, in my case Macintosh HD to the Source box. Then drag the logical volume you've just erase (in my case its called Untitled) to the Destination box. Finally click Restore to start the cloning (restore) process.

Disk Utility will now copy your disk image block by block. This process will take between a few minutes to over an hour depending on the size of your hard disk and data. For example, the 25GB image that I used took about 9 minutes to finish copying.

When you're done, just restart the Mac and it will boot with the new image, just like that. I created this guide because over time I tend to forget the correct partition to drag and the important steps to take (like erasing the destination hard drive first) to accomplish this cloning exercise. If you follow these steps exactly to the letter, you will hopefully will not encounter any problem in cloning your Mac. The most common mistakes are like dragging the wrong partition or not mounting the source image first beforehand. If you see a dialogue box about scanning the disk image first before restoring, you probably missed a step earlier or you've selected the wrong partition. Remember it is always the second partition for the source and destination image. Other common problems you could encounter include faulty external hard drive, faulty external hard drive cable (no kidding) or a corrupt source image. This guide was created on a Yosemite 10.10 machine but it should be similar on Sierra or newer systems.
No comments:
Post a Comment