
If you’ve got yourself a DSLR, a GoPro, an iPhone and another point and shoot side camera, you’d think you’ve got the complete package and there’s nothing else photography-wise that you need right? Well, wrong because even with all that I have always dreamt of taking pictures and videos from a bird’s eye view. Hence the need for a quality drone with a good camera.


Drones in the market are a plenty, from cheap sub 100 ringgit generic brand drones to top of the line GoPro Karma and DJI Mavic and Phantom drones which could easily fetch RM10,000 or more. While I’m tempted to buy one of those cheap China-made drones, I was not willing to sacrifice photo quality for cost. Hence why I finally decided to get DJI’s entry level drone, the DJI Spark.


I got mine for about 1,300 ringgit off Shopee, the basic model without a controller or propeller guards and extra batteries. My basic package only comes with a single battery, 2 extra propellers and a charging cable, that’s about it. A remote control is highly recommended if you’ve got cash to spare because it would easily double your drone’s range. The DJI Spark is a lot smaller than I thought, about the length of my iPhone 8 Plus which comes with some pro and cons. The tiny size makes the drone ultraportable and it can easily fit any backpack with it’s propeller closed. However the tiny size also limits the battery life so you will need some extra batteries if you wanna shot long footages or photography.


As always I’ve done extensive research and review before my purchase so I’ve learned a little bit about controlling the Spark with just my smartphone. Connecting the Spark to my smartphone is a pretty straightforward process if you follow the instruction carefully. After the initial update, I would recommend you set your smartphone in airplane mode but turn on only the wi-fi to easily connect. Somehow the drone is rather finicky in connecting if you’ve got your phone’s data on or the wi-fi connected to an Internet source. Another tip I should give you is to be mindful when flying the drone indoors. Right after lift off, the drone will automatically hover up about 1 meters from the ground so make sure you have no obstacles around it or risk collision and breaking the propellers. Better yet, don’t try to fly the drone indoors unless you absolutely must. Outdoor flight is the best and safest way to control your precious drone.


The basic unit with the standard battery can give you approximately 15 minutes flight time. The maximum flight altitude that I usually get is about 42 meters up and 100 meter range. As I mentioned earlier using a separate remote controller, you can fly the drone up to 2km away. That said I would advise you keeping the drone in your sight at all times because the risk of losing your drone if it flies too far away is very real. I can recall the half dozen times I lost sight of my Spark only to scramble to get it within range again before it automatically lands god knows where when the battery runs out. While the Spark has a smart obstacle detection features, it could only hover for as long as the battery doesn’t run out. Once it does, it will simply drop dead on the spot. That said, although I’ve encountered a few near-panic experiences where I lost control of the drone, I had always be able to connect back to the drone again, usually by moving really close to the drone. As a rule of thumb, avoid flying the Spark in really crowded places to avoid losing control of the drone due to radio interference.


Learning to fly the Spark takes some practice and a considerable flight time, just like a real pilot. The more you fly your drone, the more experienced and good you will get. As I mentioned earlier, the best place to fly your drone is outdoors with a lot of empty space away from buildings and radio interference. I have once tried to fly the Spark in downtown KL but I immediately run into trouble just getting it to fly straight up. My guess is the number of tall building and radio interference (cellular and wi-fi signal) were just too high in the cities so they will directly interfere with your drone’s signals. Controlling the drone with a phone takes a little bit of a learning curve. You need to familiarize yourself with all the virtual buttons and sliders, which one will go left or right, up or down and the sliders for the camera. Reading the included manual does not help very much so I would advise you to watch one of the many Spark flying guides available on YouTube. One particular guide showed me how to switch the camera tilt button from the regular motion sensor to the virtual slider which provides better control and less shake while taking pictures which proved to be really useful.
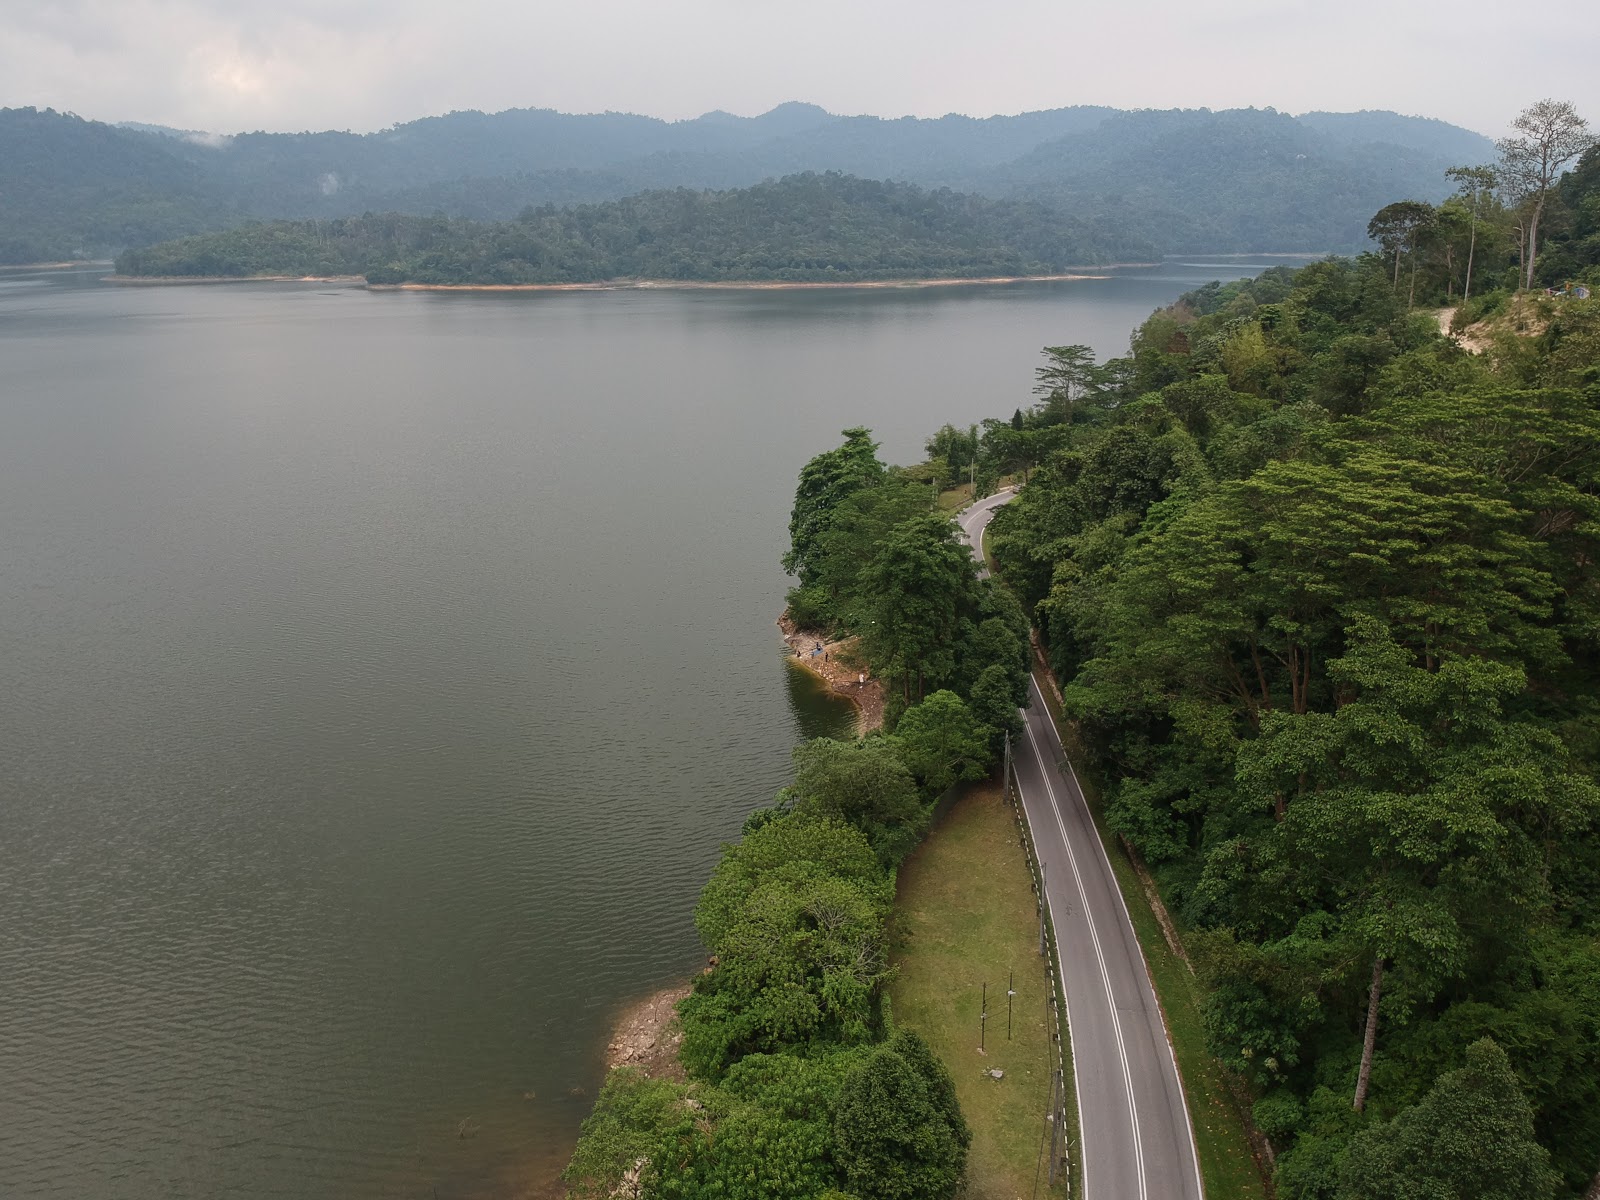
Don’t be fooled by it’s compact size. The Spark’s camera does its job really well and the drone itself is engineered for maximum stability even in strong winds. A mechanical 2-axis gimbal ensures you don’t get any shaky footage and pictures. The f/2.6 wide-angle lens on the camera captures details on the ground in stark detail and unmatched clarity. Thanks to the 1/2.3 inch CMOS sensor, the camera can capture beautiful footage at 1080p and images at 12 MP which is comparable to those taken on an iPhone 7. The camera department is where the DJI line of drones shine over those cheap competitors. You can see some sample photos and videos that I’ve taken with the Spark above.
As the popularity of personal and commercial drones grow, so does the laws and regulations associated with flying drones in public spaces. I’m not sure where you can get the official list of no-fly zones in this countries but as common sense goes, you most definitely cannot fly your drones at any airports, government and official buildings. From what I read, KLCC and Putrajaya are also included in the no-fly zone list. I’ve been to a few tourist spots like the Boh Tea Centre in Cameron Highlands where the staff quickly asked me to bring down my drone as soon as they spotted it. I don’t know what’s the rational behind it, since it’s a really open and spacious tea plantation. What harm could a little drone flying above the tea leaves could do. But to avoid any conflicts or troubles, I just followed his orders and pilot my drone down anyway. Worst case scenario he could confiscate my drone and/or eject me from that private property. It is best that you ask for permission from the security or person in charge before flying your drones in touristy places just to avoid any untoward incidents with yourself or your aircraft.
After nearly a year of flying the Spark, I’ve taken hundreds of photos and videos over beautiful streams, parks, fields and even on top of a mountain once without any trouble. It is quite sturdy too because it had once collided with a fence while landing but to my surprise everything, including the fragile-looking blades are still intact. As an entry level drone, the DJI Spark is at good as it gets. For its price and specifications, you get a compact drone with a fairly advanced capabilities comparable to its more costly siblings. I would recommend the Spark if you’re just starting to get into aerial photography and is limited on budget. If you have more money, getting the more advanced DJI Mavic Pro is the obvious answer. As for me, I’m just happy with my Sparky for now. Bought an extra battery pack as a spare and now I can add another 15 minutes to my flight time. Of course I’m thinking of getting the extra remote controller some time in the future but at 450 ringgit a pop, it is not on top of my priorities list.
No comments:
Post a Comment