Using Microsoft Office Outlook Connector
The easiest way to access your Hotmail account from Microsoft Outlook (2003/2007) is by using the Microsoft Office Outlook Connector program from Microsoft. First download the free application from here.
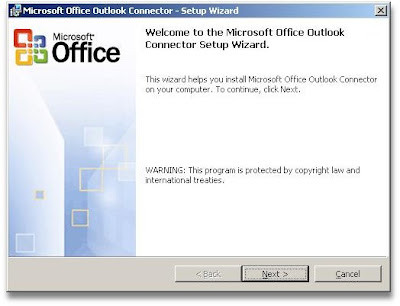 Install the Microsoft Office Outlook Connector.
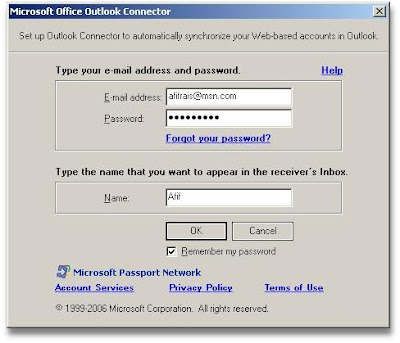 Enter your full e-mail address and password.
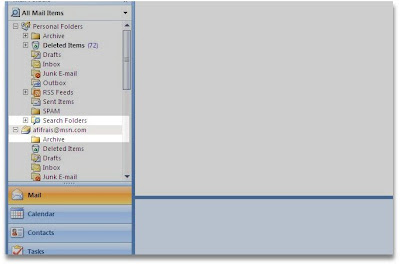 A new account will be created in your Outlook accounts folder. Should somehow the Office Outlook Connector doesn't work, you'll have to configure your Outlook settings manually.
Instruction for Microsoft Outlook 2003 and older
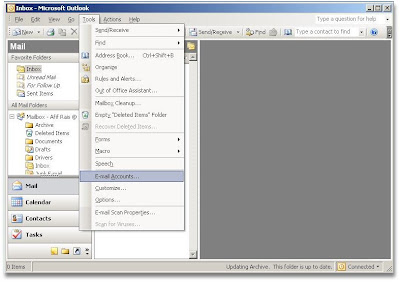 Open Microsoft Outlook 2003 go to Tools > E-mail Accounts.
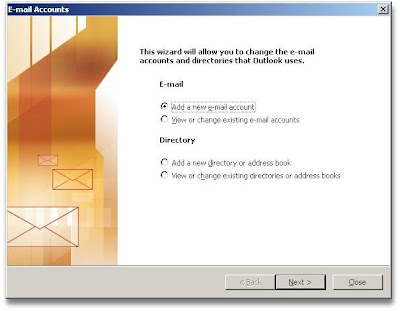 Select Add new e-mail account.
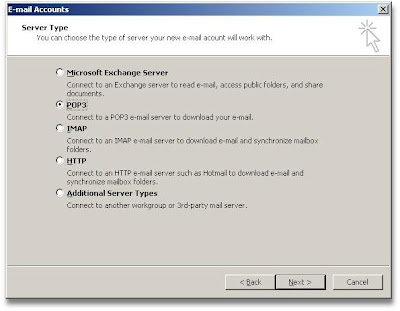 Select POP3.
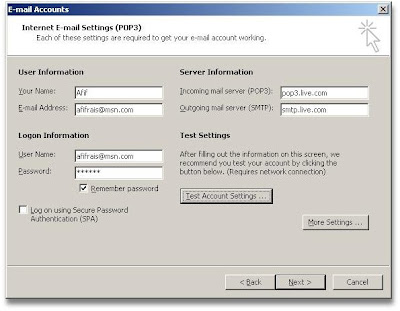 Fill in your details as the picture above. Remember to fill in your full Hotmail/Windows Live e-mail address at the User Name box. After that click the More Settings button.
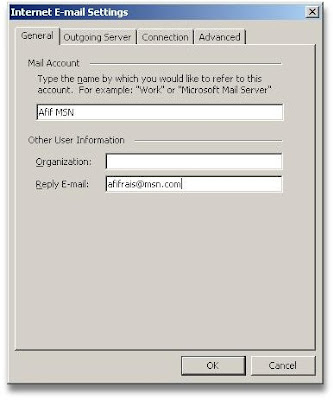 On the General tab type in your account name, it could be anything (up to you). It's also a good practice to fill in the Reply E-mail box with your full e-mail address.
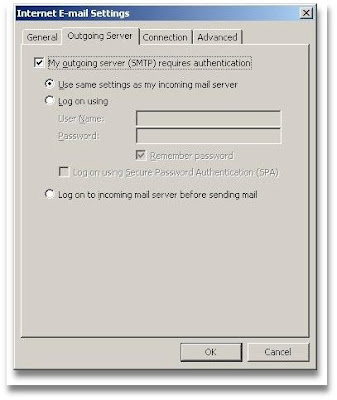 Next click on the Outgoing Server tab. Tick on My outgoing server (SMTP)requires authentication and select Use same setting as my incoming mail server.
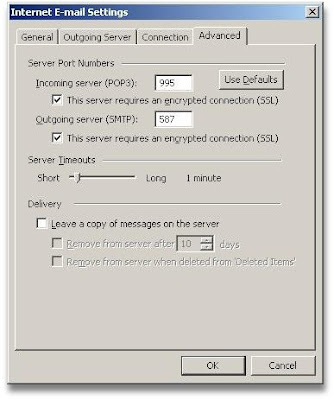 On the Advanced tab, enter 995 for Incoming server (POP3) and 587 or 25 (depending on your ISP) for Outgoing Server. Tick on This server requires and encrypted connection (SSL) for both Incoming and Outgoing server. Click OK to save your settings.
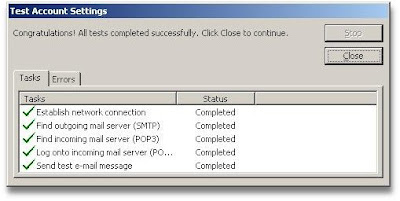 You can now click on Test Account Settings to see whether this configuration works.
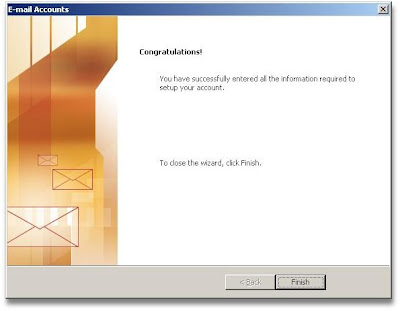 To close the wizard click Finish.
Instruction for Microsoft Outlook 2007
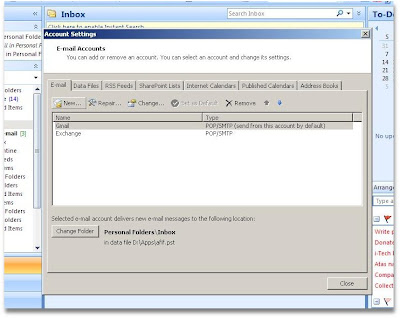 Open Microsoft Outlook 2007 and select Tools > Account Settings. On the E-mail tab click New.
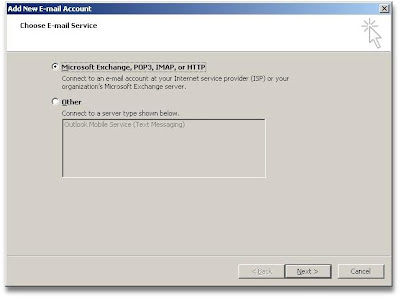 Select Microsoft Exchange, POP3, IMAP or HTTP and click Next.
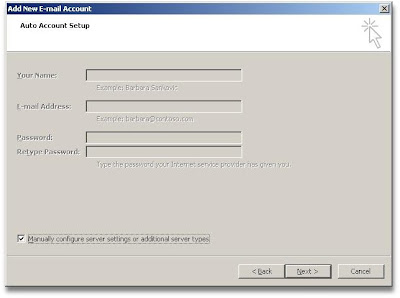 Tick Manually configure server settings or additional server types.
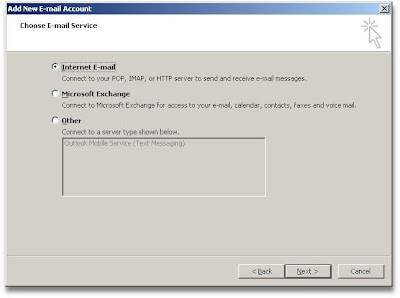 Select Internet E-mail.
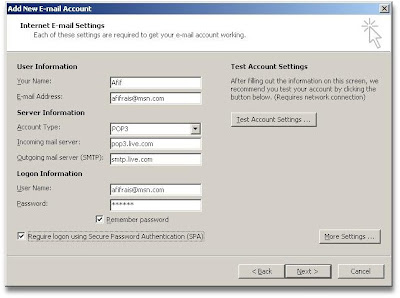 Fill in the details as in the picture above. Remember to tick on Require logon using Secure Password Authentication (SPA). After that click on More Settings.
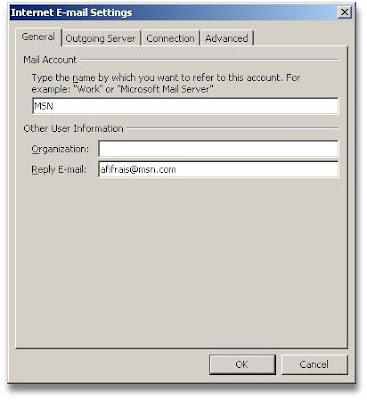 As always, fill in your e-mail address at the Reply E-mail box.
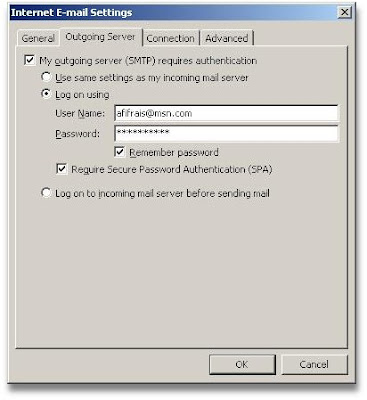 On the Outgoing Server tab tick My outgoing server (SMTP) requires authentication and fill in your full e-mail address and password. Also tick on Require Secure Password Authentication.
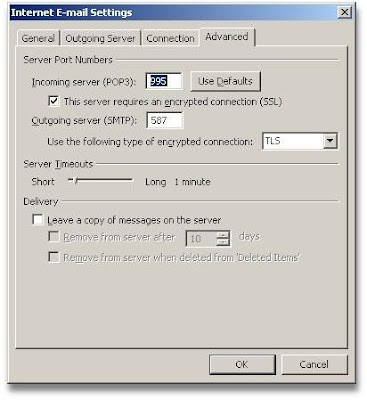 On the Advanced tab, fill in the port numbers as above. Again, the Outgoing server number may be 587 or 25 depending on your Internet Service Provider. Tick on This server requires an encrypted connection (SSL) and select TLS for Outgoing server (SMTP). Click OK to finish...
 ...and and click Test Account Settings.
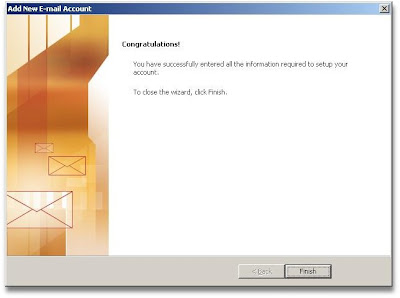 Click Finish to exit the configuration.